|
|
"Now that's what I call a cave. If I was a masked avenger, that's where I'd be keeping my shit... Need someone to get rid of the bats though. Maybe a butler... or Helledryn?" |
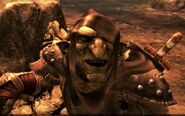
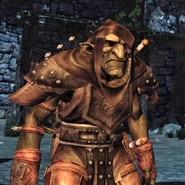
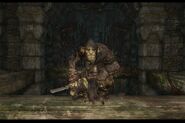
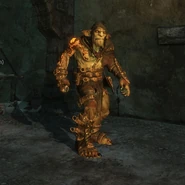
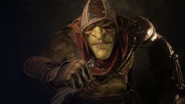
Styx is the first of all goblins and so far, the only one capable of speaking. His speech is as foul as his stench but sarcasm and humor make up for it. Styx's small figure and strong limbs make him a master of stealth and he works as professional thief, assassin and mercenary.
Due to the rather undesirable reputation of his brothers he has to tread lightly among other races and avoid guards (in general) or C.A.R.N.A.G.E. (in particular) at all cost. Apart from the people he works professionally with, such as his dealers Ozkan or Ephron or the members of the Black Hand, he isn't shown to have any closer relationships.
Only days after his "birth", Styx not only destroys the Tower of Akenash, a human built fortress that once held a World Tree secure, but also plays a vital role in instantiating the rapid duplication of goblins that are now rampaging the Iserian Continent.
After that episode he moves to Thoben, making a name for himself, which, incidentally leads to him meddling in politics between the Dark Elves of Korrangar and the Dwarfs. Even though he discovered and stopped the inhumane slaughter of the Goblin race for Amber, the elves and dwarfs run into a conflict that leaves many corpses and a destroyed homeland behind.
Finally, Styx ends up with Monkey and the Black Hand by the Wall's Shantytown. Hired to guide Arkail through the country, pick up Arkence and then get them to the Emperor's feet, he only ends up worsening the conflict and war between orcs and humans. Nonetheless, he made new friends and allies and intends to stick around and see it through with them, till the end.
Personality
Styx is a very old goblin and incredibly intelligent for his species. Even though he wasn't technically the one living through the 250 years of existence before his own birth, he was still (unconsciously) exhibiting a vast amount of know-how and ability that stems from that period. Even if it's something as simple as reading and writing, due to that pre-existing knowledge and skill, he is confident right from the start and embraces his advantages, making it all work for him.
He goes about his work with a good touch of sarcasm and self-flagellating humour, nor does he censor his own speech. Styx likes to provide commentary for his own actions and the circumstances he finds himself in.
|
|
"[...] let's focus on me getting laid... Ah paid!" |
Freedom and privacy but also personal power guide all his decisions. After being tricked and controlled like a puppet by his own creator he has no intention of ever allowing that again. The only moment when he willingly submits to someone else's rule is during his time with the Black Hand, which is a group of mercenaries lead by Monkey. And, of course, by fulfilling the contract work he agreed to do.
While he proclaims often to favour his privacy and being alone over having a family, it is evident that he still needs relationships and social contacts. He has a weakness for gambling and enjoys playing games like cards for money (not always successfully, he lost a set of daggers). He does show compassion after Querberus's death and reluctance to perform a 'psychic rape' on Arkence. He frees Helledryn, insists on helping Brune even if it means taking a risky detour and he does settle with the Black Hand members. While Styx usually tends to be very careful and to avoid dangerous situations as opposed to open confrontations, the friendship he developed with Arkail leads to him deciding to stick around beyond what he was promised to be paid for.
Biography
Summary
Styx, as the player meets and controls him in all three games, is a clone to the original Styx, who was an orc scholar a long time ago. He accidentally mutated into the first goblin by the magic of the World Tree when he tried to study the properties of its Amber. This was the same power that mutated humans into the first elves, although their transformation was deliberate and voluntary.
In Styx: Master of Shadows, he was coughed up by his creator, the original Styx, with enough intelligence and self-awareness in order to carry out complex tasks successfully. Having learned that he is nothing but a bad copy, branded and forever at his creators mercy, with no agency or privacy and freedom, he vows to rid himself of that cursed origin. Every step of the latter half of the game, is Styx revolting and opposing his creator. And whether he wanted it or not, in the end, the Amber did not allow Styx to die but rather granted him a new beginning. Born from the ashes of the Tower of Akenash and The World Tree, Styx rises once more, as a free and independent Amber creature, the only goblin capable of coherent thought and speech.
Origins / Styx: Master of Shadows

Waking Up
Styx awakens in an empty room with a terrible headache. He follows some guards to first recover his beloved dagger ("I feel naked without my dagger."). Pausing for a second to look at the World Tree, Styx remembers why he is here in the first place - to grab the Heart of the Tree. He finds some poor maps of the area, too, but knows he will need something better to find his bearings. He proceeds through the distillery, snatching any Amber he can on the way.
Meeting Ozkan
Upon leaving the distillery, Styx runs into a dead end but is aided by Ozkan. According to his memory he can trust this man, but he has to pretend, since in actuality he remembers nothing about their relationship. He also gratefully accepts small maps showing the location of some valuable objects around Akenash for some extra cash. Ozkan sends him towards a hideout in the sewers, where they meet up again. Styx dares to ask about Ozkan and he kindly reminds the goblin that he deals what Styx steals.
Securing An Escape Route
Thanks to Ozkan's tips, Styx starts to make his way to the Akenash Embassy, in order to check out the flight schedule of incoming and outgoing airships, the only way to leave the tower. He goes via the Atrium, an open port zone where he takes care of a human labourer named Godbert. A small side-job for Ozkan who promised to make it worthwhile for Styx.
Securing the Maps of Akenash
From the Embassy Styx can proceed straight to the Library, the most likely place to find detailed maps of the tower. Ozkan arranged one of his associates, Ector, to meet with the goblin and show him the way. Ector is quite surprised and afraid but also curious about Styx, however, doesn't receive amiable answers. Styx proceeds on his own into a closed off section and with a bit of sleuthing, finds a way to display the maps on the high walls of the library for him to remember. Afterwards he takes a shortcut through the Incinerator section to get back to his hideout.
Getting The Access Key
Styx knows that the bridge that leads to the Tree is secured by a gate with an unpickable lock. Therefore, he needs to grab the key from Governor Barimen himself. Once more Ozkan provides Styx with useful information and the goblins makes his way to another port zone where he hides in chest that is meant to be delivered to Barimen's private apartment. Still in the chest, Styx overhears staff talk about a secret room in Barimen's bedroom, so he heads there straight away, finds and enters the secret office. He does not only collect the key there but also finds a huge pipe systems that appears to allow Barimen to spy on various locations throughout the tower. Without delay Styx returns to the hideout.
Freeing his 'Friend'
Styx has pretty much everything in place now to proceed with his plan to grab the Heart of the Tree. However, he is convinced he needs to free a 'friend' from the prison first, as they would know how to deal with one of those pesky elves. Styx ventures through the city, the low security section of the prison, the official laboratories AND the high security section to finally reach, at the very end, Cell No 5. He picks the lock and opens the door.
The Truth About Himself
In surprise he faces himself, another goblin like him. It turns out that Styx is a mere clone of another Styx, just doing what the other Styx wants and he realises that none of the actions he did or thoughts he had were for himself. Styx is attacked by his creator and left to die.
Defiance
Thankfully Styx is tougher than he looks. He survives and follows the other Styx back through the prisons. Seeing even more clones die, Styx is now obsessed with opposing his creator and being his own master. He manages to catch up with the other Styx and witnesses him interrogating Aaron Barimen, who has ordered the bridge to the Tree be destroyed. This was unknown to Styx, and while of no issue anymore to him, it is still of importance to his creator who wants to find an alternative way to access the Heart. And Aaron delivers the answer when Amber is poured over his face, allowing BOTH Styxes to read his mind. The towers architect, Querberus is still alive and hidden in the sewers. Styx intends to get to Querberus before his creator does and continues his way back to the hideout, always a step behind the real Styx.
Finding Querberus
Styx only finds Ozkan in his hideout, who is surprised to see him. Styx is not particularly happy about having been used by Ozkan and promises the smuggler that he will die. Filling up his resources again, Styx leaves the hideout to start his search of the sewers. Following a lead extracted from a guard leads him into a trap from which Styx barely escapes. Annoyed, Styx moves further and looks into a different part of the sewers where he finally does come across the personal attendant of Querberus. He simply has to follow that man and sneak past him to access Querberus's hidden lab. Despite Styx's unique appearance, the architect isn't bothered or suspicious at all and shows that he suffers greatly from a short-term memory loss. Styx uses that to his advantage and tricks Querberus to come back with him to his hideout.
Trying the Settle Scores
When Styx and Querberus return to the hideout, Styx suddenly remembers his father and the dagger he received as a gift.. before realising that this isn't HIS memory but merely a thought forced upon him by his creator. Disappointed by his clones lack of gratitude for memory and identity, he asks his clones telepathically to bring Querberus to him. Styx follows the way to where his creator is but leaves Querberus safely behind. As they two goblins continue to communicate telepathically, Styx tries to sneak up on and kill him but fails. His creator whines about his transformation from orc to goblin and how he did try to end his own life without success several times. Styx finds out for himself, as every strike at his creator misses. Annoyed by his clone's shenanigans, the creator attacks Styx once more. Thankfully an elf is approaching, which causes the creator to flee in a hurry, leaving his business undone.
Working with the Elves
The elf brings the injured Styx back to his hideout. He introduces himself as the elf ambassador and explains to Styx that the situation is grave and that he needs him to fight his own creator before he can take the Heart. Not only that, he will need Styx's help to relieve political tensions as well and in return, offers Styx a way to free himself forever from his creators control - being reborn as a pure Amber creature.
Proof of Foul Play
The elf asks Styx to find evidence of Aaron Barimen's foul play in the tower, before he meets with Governor Barimen to discuss the political situation. He knows that Aaron is smuggling Amber and is conducting experiments on the prisoners, and suggest to find and collect the records of the Amber production and Prisoners from the library and embassy. As Styx makes his way through the library to collect those records, he also comes by a forged letter, that calls for an attack by the elves against the humans.
Barimen's Assassination
With all evidence ready, the elf and Barimen meet, while Styx is hiding in a cupboard out of sight. Before the two can discuss the matter, however, the real Styx appears and assassinates Barimen right in front of them. As quickly as he came he disappears and leaves elf and Styx in a mess.
Querberus's Way to the Heart
With the situation getting worse, it is paramount that Querberus remains safe and out of reach. Styx will bring the architect to the elf who can better protect him. Unfortunately, when Styx reaches Querberus by the docks, he is lethally wounded and a smirking creator leaves the scene. Styx can't do much to help Querberus but in his dying breath the old man reveals another way to the Heart of the Tree: The pipe spy system and its main duct, leading straight to the Tree.
Aaron's Reign and freeing the Elves
Things go quick now. Styx and the elf return to the hideout one more time. Aaron has taken over as the Governor of Akenash and imposed a curfew on the elves. The ambassador asks Styx to release them. The goblin agrees and thankfully, the cocoon in which he can become a real Amber creature isn't far from their location. He sets off, through the city and back into the distillery. Since Aaron is leaving the tower to formalise his new title with the Emperor, Styx needs to steal the key for releasing the elves from another guard in his stead. Neither big deal nor big detour. Upon freeing the elves, however, Styx finds himself being locked up by them as a way of saying thanks. They other elves do not share their ambassadors view of things and predict STYX to be the one to ruin everything.
Reborn as Amber Creature
As luck will have it, the cocoon is right in this area, so Styx rests in it for some time before reemerging as an independent, pure Amber creature. He finds that a large tattoo from his shoulder is gone and that no one can telepathically communicate with him any longer. It is time for the last act. Get to the Heart of the Tree, face his creator and kill him.
The Battle for the Heart
With the elves free, getting to the Barimen's secret office is a little harder but Styx manages nonetheless. He rolls through the main duct right to the location of the Heart in the Tree. He finds his creator working on releasing the bond that keeps the Heart secure and surprises him. His creator sends several lesser clones after Styx but to no avail. Styx defeats all of them and when the last bond is broken, Styx snatches the Heart before his creator does. With the Heart in his hand Styx faces his creator directly. The original Styx relates his story, the shame he felt for not being on orc anymore and the nightmares he went through to get here and undo the damage. He offers Styx freedom in exchange for the Heart. But Styx has none of it. He does all he can to increase the suffering of his creator, so he destroys the Heart in his clenched fist. Furious the original Styx is about to lynch his clone but again, Styx keeps the upper hand and simply takes his own life by throwing himself deep down into the Amber lake by the Tree's roots. From there, rakash emerge and climb up the stem and tear the original Styx apart. All as they Tower of Akenash crumbles and falls from the sky with the dead World Tree inside.
Styx recounts his birth. Waking up in a dried up lake bed, without memory, the many 'me's that where there, too, and his final realisation, that he is the one and only Styx in this world.
Styx: Shards of Darkness
Background
Styx came to Thoben a couple of months after the Fall of Akenash. He made himself a new outfit and has lived there ever since for the last couple of decades.
Caskets of guard's pay
Styx has accepted a small job from Ephron, a smuggler in Thoben: stealing the caskets containing the guard's pay from an Inn. Despite the destruction of the rarely visited area, Styx finds it got potential for a new hideout. After taking the caskets, he steals a small hot air balloon to return to his hideout and from there, proceed to deliver the goods to Ephron.
A new job
The transaction went fine but before Styx can return home, he is surprised by a C.A.R.N.A.G.E. ambush. He drops a chandelier for distraction but the squad isn't here to attack him. Instead, their captain Helledryn offers Styx a deal: Steal an ambassador's scepter in return for a lot of Amber. Styx cannot resist the golden sap and agrees. Ambassador Arsidi's airship is dropping by once more tonight, so Styx continues to the Guild's docks and slips onto the airship.
Incident by the scepter
Once the transporter ship joined up with the main fleet, Styx heads towards Arsidi's private chambers. He finds the ambassador with a cut throat in a cupboard, however he doesn't expect what happens next. As he approaches the scepter, getting ready to kill the human in the room, he is suddenly paralyzed. The human has added a crystal to the scepter and uses its powers to overpower the goblin. To his surprise the human shapeshifts into a dark elf who takes Styx's attempt to consume Amber personal. He throws Styx out the window and returns to a human form to alert the guards about the scepter stealing goblin. Styx has no choice but to retreat and return empty handed to Helledryn.
What is this all about
Helledryn explains to Styx that the scepter was an invitation to a summit held in Korrangar, city of the Dark Elves. Since Styx is still eager to get the Amber, he continues to assist Helledryn getting there. He also has a personal interest getting back to the dark elf who kicked his ass. Helledryn suggests they pretend to be a merchant ship in order to gain access to the city.
Entering Korrangar
Styx is dropped outside the area but manages to slip into the fortress easily. He looks for the import office in order to add Helledryn's vessel to the expected incoming airships. He also grabs an official pass, without which the CARNAGE captain would not be able to enter and move around Korrangar. Finally, he loosens a small hot air balloon and Helledryn on her airship enter the city. Styx slides the pass under her cabin door and they agree to meet at the final mooring dock.
The Glorious Blood Ritual
Styx takes a stroll through the residential quarters of the city, in order to find out a bit more about his dark elf. He overhears some guards talking about the traitor Djarak, who fits the bill perfectly. They also discuss a ritual called the "Glorious Blood". Without much choice, Styx walks into the ritual and comes to witness it as he passes by. Two dark elf warriors fight each other to death, supervised by priestess Maolak and High Priestess Lyssril. What Styx didn't see coming was that the surviving winner ends up pierced to death by a large tentacle and he gasps in surprise. This draws the attention of a dark elf guard and Styx has to turn himself invisible to avoid detection. Thankfully, after the commotion around the ritual ends, Styx can continue to catch up with Helledryn.
The Amber storeroom
Before heading off, Styx decides to check out the Amber storeroom he read about. He learns that the elves have a daily dose in order to achieve that same telepathic community he had seen among the elves in Akenash. It is none of his business but he does wonder where the Amber comes from. The entrance itself is locked by a mechanism easily cracked. Styx grabs as many vials as he can carry and makes his way to Helledryn.
How to join the summit
Reunited at Helledryn's airship, the two make a plan to join the summit. Helledryn will need another pass to enter the Sanctum and a disguise, maybe a guards uniform, in order to be present at the meeting. Knowing that Djarak will be there, too, Styx wants her then to flush him out into his direction. For this, he must find out which identity he has stolen and shapeshifted into.
Getting Pass and Uniform
While Helledryn makes her own way towards the Sanctum, Styx looks around the Noble's quarter to steal both, the pass and a uniform. There are two locations in which Styx expects to find something fitting for Helledryn, the steam baths or the dwarf embassy and both proof to be a success. As for the pass, he simply takes it from another young priestess. Helledryn then opens a window for Styx and he joins her inside the Sanctum.
Djarak's identity
Styx overhears some of the elves talk about their visitors, letting on that one of them received a curious letter. Following that lead, Styx discovers the Ambassador of the Catfish kingdom dead. With that knowledge he returns to Helledryn and informs her about Djarak's new identity.
Facing Djarak after the summit
During the summit, Styx stays hidden behind the grills of a ventilation path and observes the events. After Djarak reveals himself, Styx as much as the elves themselves, follow the faint trail of blood left behind. But where a locked door stops the elves, Styx crawls through a small opening to a terrace laying behind. In anticipation of confrontation, Styx hides an Amber cocoon before looking around. Djarak does emerge and holds his sword against Styx's back, however, the clone emerges and jumps up onto Djarak to distract him. Styx quickly moves away, readies and points his small wrist crossbow at the elf while demanding to know the location of the Quartz. Djarak yields and tells him about the mines. When other elves approach again, Djarak uses the moment of distraction to attack Styx once again but the goblin can evade just in time. Feigning injury at first, Styx then reveals the small Quartz pendant in his hands, that was around Djarak's neck seconds before. Styx thanks him and then takes his leave, disappearing down the side of the terrace.
Excursion into the Mines
Styx returns to Helledryn and they briefly discuss the outcomes of the summit. Styx has a look at the Quartz pendant worn by Djarak and finds that consumption of a finely ground powder has quite stimulating qualities. He tells Helledryn to wait for him and then makes his way into the mines. On his path through the mountain he comes across Roabies and flying wasps that would both attach him with acid if a confrontation was triggered. Styx discovers that the elves have an impressive mining operation in place and proceeds past their barracks to Lakima's lair.
Lakima
Lakima wears a another powerful Quartz crystal by her neck and so Styx enters her lair in order to grab it. Despite being a lot larger than himself, he manages to beat her by weakening the Quartz links around her. Taking the Quartz from her body equals the finishing blow. The moment Lakima dies, Styx hears a voice asking "Where is my queen?" and following that an elf raises the alarm. Unfortunately for Styx, he cannot keep his mouth shut and teases the elf by responding "Ooh, a scary goblin killed the queen" which focuses the efforts of the elves to finding a talking goblin.
Escape via the prison
Helledryn is in a bad mood when Styx returns to her. Korrangar is in lockdown and she cannot leave while the elves are searching every vessel for the talking goblin. She suggest to hand Styx in as a regular goblin, which would allow him to escape the prison to Wildoran. Styx is thrilled to roam among the other goblins without his equipment but considering the lack of alternatives, he agrees. Handing his clothes to Helledryn, he allows himself to be thrown into prison. With Helledryn's help, he finds a way out and towards a barge, that connects Korrangar to Wildoran underground. Naturally, even stark naked, he is not afraid to make a small detour in order to collect some more pure Quartz from the prison staff quarters.
From Wildoran to Thoben
Once arriving in Wildoran, Styx needs to take extra care avoiding detection by the dwarfs roaming the city. He comes across a special formula that creates a cologne covering up his unique goblin smell. In order to return to Thoben, Styx can take the water or air route. If he goes by boat, he simply needs to drag the drunken captain to his ship. If he opts for the airship route, he will need to free the captain from prison, who turns out to be Ephron, his former dealer.
|
|
"Farewell and adieu, to a place filled with crazies... Farewell and adieu, back to Thoben I'm bound... I'd rather be buried in shit up to my nipples... Than spend one more second, in this shithole town..." |
Back in Thoben
Styx returns to his live in Thoben for a couple of weeks before Helledryn shows up. She reports that his promised Amber was taken by two more CARNAGE deserters and all she can offer him at this point is her airship, which is still moored in Korrangar. Styx isn't very happy about this and decides to get revenge first before sorting out Helledryn's dept. Since the two deserters have taken over the Thoben Guild, Styx knows where to find them and heads out to get rid of them. He would actually love to see Helledryn as the new Guild leader and intents to tell her so upon his return.
Abduction
When Styx returns to his hideout, Helledryn is unconscious and tied up. Shortly after his discovery, the goblin is knocked out, too. He is being returned to Korrangar by the dark elves and hung up alive inside the Labyrinth of Passage, where he would be sacrificed to the winners of this dark elf ritual. He is freed by an unknown helper and doesn't waste time to make his escape from the area.
Labyrinth of Passage
The only way to escape is by collecting the 6 tiles and placing them in their slates, which will open the door out. Annoyed Styx ventures through each trial while at the same time avoiding being detected by the elves. During the Trial of Covertness, he comes across Helledryn, who is stuck inside a large cage. He offers his help to get her out, but Helledryn declines that much. She would appreciate, however, if Styx got rid of the big troll in the area. Accepting her gratitude as reward, Styx kills the troll and then bids goodbye to the thankful CARNAGE captain. Once Styx has all the tiles, he opens the door and passes through.
Teaming up with Djarak
After the door, he meets Djarak once more. The elf tells Styx straight away about Lyssril's control over Amber creatures and thus gets Styx to cooperate with him. They return to Helledryn's airship and discuss their appoach of eliminating Lyssril's power over his people and Styx.
Cast the Blame
Lyssril's power comes from two things: her political alliance with the dwarfs and her resources of Amber. First, they plan to kill the dwarf ambassador and casting the blame on Maolak, the dark elf priestess. Styx goes back into the Sanctum to locate Maolak and steal a ceremonial dagger from her. Once has that, he goes to the Noble's Quarter and the dwarf embassy, to lure the ambassador into a secluded place. There he simply kills him and leaves the dagger behind.
Preparing for destruction
The ambassador had a drawing of a technical machine on him. According to Djarak it can produce Amber and needs to be destroyed. Styx only reluctantly agrees to that, given his own addiction/dependence on the sap. But Quartz proving to be a useful alternative, he can deal with the loss. Styx can find suitable explosives in Wildoran, so he returns there. The explosives aren't hard to find and he meets up with Djarak soon after on the barge to put them in place within Korrangar.
An end to the Amber production
Styx places one bomb by the barge, so that no more goblins from Wildoran can be delivered. He also places one inside the prison laboratory, so that no more Amber can be processed. And finally, he plans to put one inside the Amber reserve itself. He has to go back through the prison and through the Amber producing machine. Styx is quite disgusted to find out that the elves were pressing life goblins in order to extract their Amber but his proceeds through it and places the bomb appropriately. Despite his approval of the plan as suggested by Djarak, he cannot enjoy the destruction of the reserve as much as the elf.
Leaving Korrangar
Back on Helledryn's airship, Styx and Djarak discuss the events. As they plan to leave, more rumbling alerts them. A large stone golem has risen in the middle of the Residential Quarters and is blocking the exit. It was a gift by the dwarfs but the elves did not expect it to be a war machine. It is down to Styx and Djarak to get rid of it. Djarak suggest to fire the two balistas at him and the split up. While Styx manages to do his part, Djarak is covered by falling rocks, forcing Styx to cross the area from one side to the other in order to complete the task. He does manage and brings the golem down.
Finally free
Unexpectedly Helledryn's airship passes by Styx and he has to hurry and scramble to get on it. After it passed through the gates into freedom, Styx makes his way up to the captains cabin, to find Djarak standing at the wheel. Styx is annoyed and points his crossbow at him, ready to shoot.
Of Orcs and Men
|
|
"And your Goblin is... surprising, really. A valuable ally from what I can see." --- Gorkash |
|
|
"Why go to all this trouble just to reach a fucking island? The Imperial palace is at the top f this tower, right? We can wait in the kitchen then give him a nice tasty breakfast... of death!" |
Background
Styx has left Thoben and ended up in the Shantytown by the Wall, joining Monkey's Black Hand group of mercenaries. He accepts a special job and makes his way outside the Shantytown walls to meet the Bloodjaw he was waiting for.
Getting Arkail to the Black Hand
Hooking up with the orc is easy enough. Styx warns Arkail that due to the increase of Militia, a new curfew and the Inquisition, they have to move carefully. He opens the gate to Shantytown for Arkail and they make their way through the allies towards the hideout. Styx is familiar with one of the Militia guards and asks him to be allowed past unseen, which succeeds. However, Sork, an orc working for the Militia, recognises Arkail as a Bloodjaw and raises the alarm. Styx and Arkail fight them off, then make their way to the hideout. As the Inquisition and Milita now know of Arkail's presence, they make further movements in the area more complicated.
Staying at the Black Hand
Styx introduces Arkail to each member and the orc learns about a few things he then wishes to pursue further. Styx can try to argue against it but in the end he submits to whatever the Bloodjaw wants to do. So he joins Arkail when he wants to go after Dorek, the Trainer and helps to get rid of him. Styx also comes along when Arkail goes out to help a fellow Bloodjaw, during which they meet Brune, a good friend of Styx, so he for sure didn't regret making that detour in order to save her. Styx also doesn't complain (much) when Arkail offers Monkey to go out and deal with a goblin scourge for him. What Styx won't participate in, is the Black Hand Challenge. Instead, he watches from the sidelines, as Arkail fights against the other members in one-to-one combat.
The Deal with Sarkyss
As soon as they possibly can, Styx takes Arkail through the Shantytown to Sarkyss, who lives in the catacombs of the Wall. After fighting off some Militia and Inquisitors, they are greeted by Raven, who then brings them to his employer. Sarkyss knows why Styx and Arkail are there and asks them to go kill off the Grand Inquisitor's disciples for him. Styx considers him a crazy nutcase but doesn't think much more about the demand.
The Chapel in the Pass
Styx and Arkail follow Raven into the Pass, where the two venture on alone. When they reach the chapel, Styx suggest setting it on fire. As they watch the chapel burn, the Grand Inquisitor returns with a few of his men. They attack the orc and goblin but when the Zealot sees the chapel in flames, he leaves the fight and attempts to rescue his disciples. Arkail and Styx continue to fight and hurry to leave the place back to the Black Hand hideout.
Raven's Trap
With their part of the deal done, Styx and Arkail ask Raven to guide them through the catacombs to the other side. They follow Raven but when they end up alone in a large room with the doors suddenly closed and locked, they realize Raven led them into a trap. Styx swears he had nothing to do with it when Arkail confronts the goblin with this, but as they are being attacked by humans, they have to put their differences aside and fight together. The manage to flee but end up on the sewers, below the catacombs. It takes them a moment but Styx actually does manage to lead them back to the outside and to the Black Hand.
Confronting Sarkyss
Being pissed, naturally, Styx and Arkail want to get Raven to talk. They force him to take them back to Sarkyss. Raven, however, gets cold feet for having failed his instructions and fears Sarkyss's punishment more than the two greenskins in front of him. He tries to run, but Styx's reflexes are flawless and he throws a knife into Raven's back instantly. They continue on their own and find Sarkyss in his laboratory, dissecting a goblin. Styx is interested in Sarkyss's motivations for his nasty work but doesn't agree with the humans ambitions. Styx doesn't really care about Sarkyss once he finds a map of the catacombs, but doesn't stop Arkail from dealing with Sarkyss anyway he likes. They leave him tied on one of his own dissection table at the mercy of a wild goblin, ready to shred him to bits.
Crossing the Wall
With the map, Styx and Arkail make their own way through the catacombs and emerge on the other side safely. Styx leads Arkail to a waiting caravan and opens the door for him. Styx closes the door and locks it, remaining outside. He wishes the furious Arkail a good journey to the Mire and bids him farewell.
Joining Arkail in the Mire
Styx makes his own way to the Mire, following the caravan. He sneaks into the mine and observes Arkail in the Row. Once close enough, Styx jumps down into the Row to help Arkail in his fight. Together they win the Row and are being welcomed by the Head Foreman. He has them sent to the cleaning quarters to rest.
Meeting the Resistance
The foreman leading them to the cleaning quarters is Adek, a member of the Resistance. He takes them to their hideout for a rest before arranging a meeting with Barimen. Styx gets bored while waiting and he learns in conversation with Arkail about the orcs father and immediate family. When Barimen finally arrives, Styx asks for his money but is disappointed since he hasn't finished his task yet. According to Barimen they now must go and free Arkence from inside her prison cell and for that, the orcs of the Resistance will put up a revolt in order to distract the guards.
Preparing for the Revolt
There are a few things they have to do before being ready to continue their mission. Adek informs Arkail about a few way to enthusiastic orcs ready to revolt after his fight in the Row. Adek asks Arkail to go and calm them down to which the orc only reluctantly agrees. Styx accompanies him to tell those orcs to relax. More importantly now, Arkail must become the new Head Foreman so Styx joins him when he goes to kill the former Head Foreman, Gorkash. Not all foreman accept Arkail, however, so he goes to find them, deal with them and question them about their motives for turning against their own brethren. Now being in command, Arkail wishes shaman Drakane to provide the Rain of the Fearless. For that, however, they need to venture into a dark natural spring to get pure, fresh water from its source. With that water, the shaman can prepare the blessing for the fighting orcs.
Taking out the human guards
Among the things to be done is also a small job specifically for Styx alone. Adek asks whether he could enter the human's garrison and take out the remaining guards there. It would save the Resistance money which they could use to better equip themselves before the revolt. Styx is flattered and agrees on the condition that Adek informs Barimen to be prepared for a negotiation of a little bonus. Thus he ventures out and kills all the guards in the garrison.
The Revolt
Marhlok brings together the Resistance members and Arkail organises the revolt as needed. Once everyone is in their place, Arkail and Styx approach the tower's base. Styx isn't very fond of the idea but has no choice, Arkail grabs the goblin and throws him over the chasm onto the tower's lookout. Styx wobbles for a few steps to make sure the path is clear and then gives the signal to Arkail to follow. Together they make their way around the tower to the drawbridge, which they then lower, allowing the Resistance to enter the tower base and start their revolt.
Rescuing Arkence
With their backs covered, Styx and Arkail enter the Inquisition's tower and make their way down to the prisons. The pass through some administrative areas, through the Inquisition's court and through the main prison all the way to the bottom. Arkence's cell is dug into the basement. Styx picks the lock. Another mage is in the cell but dies, giving his life to give Arkence some more strength, insisting she must be taken to other Mages. Styx and Arkail have no choice. They take the unconscious Arkence and take her back out of the tower. The revolt is still ongoing but they orcs are on the verge of loosing the fights. Arkail and Styx hurry through the tunnel to the surface and make their way to a Monastery in the mountains.
Psychic Rape and Styx's Past
After a couple of days, Styx and Arkail arrive at the Monastery, where High Mage Saranthe is expecting them. A Imperial soldier takes his leave upon their arrival, which Styx doesn't like. Focusing on Arkence, they hand her over to the Mages and leave Saranthe to examine her, while they have their gear repaired or upgraded. Styx really doesn't like the soldier and urges to go after him. Reluctantly Arkail does while they wait and find that nothing was amiss after all. [fact check needed] Upon their return, Saranthe exlains that rescuing Arkence could take several months. Alternatively, a faster but more dangerous way is possible: Psychic Rape. Forcing oneself into the mind of another with their consent, forcing them to relive and accept what happened. Styx is a little confused about this method and reluctant to do so, Arkail however has no qualms and presses on, since this is their only chance to successfully finish their mission. Saranthe has them all lay down in the meditation hall and begins guiding their minds to come together. Styx has to face his past first. They find themselves in a large swamp area and they follow some goblins running ahead of them. The reach a run down area of wooden shacks and a spectral copy of Styx himself. Styx falters trying to ignore it and Arkail has to step in fighting off a horde of goblins approaching. When Styx recovers he walks up towards his spectral self to resolve the problem. The spectral Styx wants to be accepted and remembered and reveals that Styx used to be an orc who corrupted himself in his search of power with the Amber, turning into the first goblin.
Styx agrees. He tried to forget and bury his past and has since then done nothing but survive. Not any more. Knowledge is power and he willfully accepts the past to move on stronger than before.
Styx makes some acknowledgement about his past but refuses to be enslaved by it. He has to stop looking into the past and instead look into the future. He shakes his past finally off and moves on stronger than before.
After Styx dealt with his past, they end up in Arkail's mind, back in Bay Harbour. Everything is in flames and Arkail is about to destroy his Berserk self who is fighting there but Arkence holds him back. Styx has to step in and help the Berserk Orc to fight off the others, allowing Arkail to make an important decision: Accept and work with his rage, or master its supression. Finally they enter Arkence's mind. They find themselves back in the Inquisition's prison and find Arkence in front of her cell. It seems she must step inside once more to acknowledge what happened and move on. When she doesn't react to Arkail's words, he simply pushes her inside, much to Styx's dismay. Arkence faces her torturers and then sets everything ablaze.
Escape from the Monastery
Saranthe interrupts all three of them, urging them to wake up. Once they are all conscious and up, he explain that the Militia and Inquisition have found them here and are approaching. He tells them to come with him and Saranthe leads them through a secret passage out to another path down the mountain. The Grand Inquisitor catches up with them and Saranthe sacrifices himself for the others. Arkence destroys a bridge to block the path after them permanently, leaving Saranthe to his death. At the base of the mountain, they take the last remaining boat of the Mages and make their way to the Island of Laments.
The Island of Laments
Upon reaching the island Styx notices how quiet everything is. He is right, as the Sister of Laments saw them approach and have taken up their patrols to get them. Styx and Arkail manage to fight through all the way to the temple. They split up there and each one proceeds independently. Styx follows a path along the ceilings and witnesses Arkail in the throne room, killing the Emperor. He remains out of sight when Barimen reveals his scheme. When the diplomats leave, Styx emerges to help his friend to free himself and escape. They return to Arkence by the boat and agree, that Barimen has to be stopped.
The second Revolt
The Mages join the Resistance and orcs in their fight against the Human Empire. Styx and Arkail return to the Mire and find the survivors of the first revolt. Arkence explains the situation and suggest that EVERY orc shall rise, help to set fire to the tower and then escape via the secret tunnel. The Mages will take care of the Inquisition in the basement of the tower and Arkail and Styx head up to the Imperial Palace to deal with Barimen. On the way, they send down explosive Amber powder to Arkence and the orcs. Arkail and Styx fight against Barimen's personal guard easily and Arkail ends up throwing Barimen off the top of the tower. The Grand Inquisitor joins them and with much effort the two greenskins defeat him, too. Arkail and Styx make their way out of the tower hastily and they join the others.
Post-Game(s)
Alongside Arkail, the many orcs and the mages, Styx watches the Inquisition's tower burn against the night sky. With the elves and dwarfs providing aid in the human's war efforts, the future of the orcs, mages and his own race, is uncertain. Styx decides to stick around Arkail, to make sure he doesn't get into any trouble.
Relationships
Arkail
Initially Arkail was merely business. But by sticking around him and doing the job he agreed to, he comes to get to know the big guy better. They come to have short conversations about confrontation approaches, relationships, their races, honour, and even Arkail's father and own family. After Styx fought with Arkail in the Row, he received a very sincere thanks from the orc for his return. Some moments later Arkail also protects Styx's honour by telling his father that his friend is not to be referred to as 'rakash' but by his real name. In both instances Styx doesn't show an immediate reaction to it, however, as he safes Arkail's life later on and stays at his side to see their battle through, it is likely those moments had a deeper impact. The only time Styx drops the facade for a word of appreciation and gratitude, is after Arkail takes care of the attacking goblins when Styx falters at the confrontation with his past.
Helledryn
Despite the many reasons to be enemies, Helledryn and Styx managed to bridge their differences with a new, clear business relationship out of their own self-interests. While not directly shown, they have come to respect each other, enough to allow Helledryn to return empty-handed (and drunk) to Styx without having to 'really' fear for her life. When they meet again after their abduction, Styx is willing to do Helledryn a favour for free. She does honour their business deal regardless and Styx comes to envision her as the new leader of the Thoben Guild.
Physical Appearance
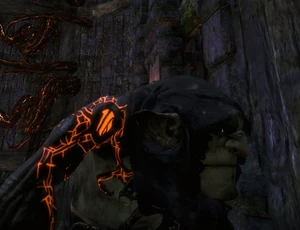
Styx's mark glowing in the dark.
Styx: Master of Shadows
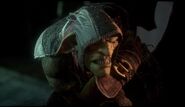
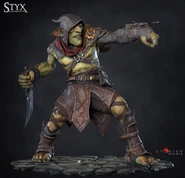
As all goblins, Styx is a small creature of only 1,28 m when standing up. His skin is a dark olive green, with lighter shades around his chest, stomach and the palms of his hands. He has long, pointy ears that move when he's picking up sounds or expressing emotions. Despite his short stature he's very muscular and physically strong enough to lift humans almost twice as tall as him or strangling grown men with his bare hands. His eyes are orange-golden and glow slightly in the dark, though is it debatable whether this is natural or a side effect of his amber use. His back is slightly hunched forward when walking upright and he's not a fast runner, making up for this with his exceptionally quiet way of sneaking. His two signature items are his hood and dagger. Generally his garb is of dark blue and black colours, with some white bandages around his limbs. The seams are not sewn well and ragged, he is barefoot and covers his torso only with a small cloth cape.
For the vast majority of the game, he also possesses an intricate Amber tattoo that glows when he is enshrouded in darkness, though in the final stage this mark is removed.
Styx: Shards of Darkness
Styx's outfit appears to be rather similar to his design in Master of Shadows. However, his standard outfit (the Thoben Jerkin) is no longer dark blue, but instead darkish brown and red. This time Styx has carefully crafted everything, so apart from wear-and-tear all seams are in order and tidy. The biggest differences in his design are his now absent amber tattoo and the addition of the wrist-mounted crossbow on his left arm. He wears tight, black cloths acting as foot guards on both of his feet, which started up his ankle down to his middle toes, each held by thin straps at the bottom arches of his feet. They were also more decorative in nature rather than serving as actual "guards", leaving him barefoot. His physical appearance hasn't changed though it is noteworthy that all the scars and cuts (like the stab marks on his back and the gash across his nose) that he suffered in the first game are visible on his body now.
Of Orcs and Men
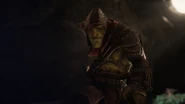
Being the actually first game to have been created, Styx's outfit is the same as what the original Styx wore in Styx: Master of Shadows, since that meant to be a recognisable reference to it's predecessor. Styx is shown wearing shoulder pad armour that seems slightly too big forhim, barefoot, wearing a red/brown-ish ragged cloak like garb, also with a long pointed hood pulled over his head for holes for his ears.
Equipment
Styx: Master of Shadows
Styx travels light (compared to his creator) in this game. He carries only:
Main Hand
|
Additional
|
Liquids
|
Other
|
Styx: Shards of Darkness
Styx carrys and possesses significantly more equipment compared to his previous adventure. Daggers and outfits are kept in Styx's hideouts and can either be found in-game or purchased as an extra.
Main Hand
|
Additional
|
Liquids
|
Other
|
Raw Materials
|
Outfits
|
Of Orcs and Men
Styx chooses to travel lightly again. This time he carries:
Main Hand
|
Additional
|
Other
|
Abilities
Standard Abilities
Agility
Styx is a very agile Goblin, showing a great number of athletic capabilities but not limited to such as jumping high, scaling walls by jumping from one foothold to another, swinging from ropes, shimmying across ledges and jumping off of them, sustaining injuries from high drops, and rolling a short distance across the ground, letting him either dodge enemy attacks or rapidly slip through their field of view. Styx can even avoid Inquisitor spells, as well as crossbow bolts and throwing knives.
Combat
Whilst preferring to avoid head on confrontations in most situations, Styx is a very skilled combatant, capable of killing foes several times his size using just his knives. Up close Styx can duel enemies from simple guards to archers and defeat them in one-on-one fights, though if facing more than one enemy Styx tends to fall short. Styx has even shown himself capable of taking down Orcs significantly larger than himself.
He also shows exceptional accuracy and throwing power with both throwing knives and sand balls, capable of killing un-armoured foes from afar with knives, provided his throwing line isn't impeded by anything, as well as lobbing sand balls to put out torches from a distance. Styx can also whistle in order to attract and lure nearby guards toward him.
Stealth
Styx's greatest asset is his stealth capabilities. Styx can easily sneak past even the best of enemies, or slip up behind them undetected to kill them with his dagger. Styx's stealth abilities are good enough that he can even remain undetected by Roabies which possess a highly attune sense of hearing. He can poison food with his poisonous spits which he dubbed "hot sauce", killing those who ingest it. It is not sure whether this poison is his spit or stomach acid, since he refers to it as both during the first and second game.
Amber Abilities
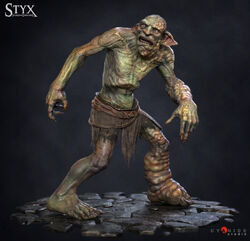
3d Concept Art for Styx's clone in SoD by Jean-Philippe Degosse.
Thanks to his capacity to utilize Amber, Styx has several unique abilities at his command, which he can use as he pleases provided he has enough Amber.
Cloning
- Styx: Master of Shadows - Styx has the ability to spit out some Amber which will form into a clone of himself. He can then temporarily assume control of the clone for a set period of time, until it either expires, he destroys it to reclaim the Amber used to create it, or the clone dies in some way. He can then use these clones to perform tasks he himself may not be able to, such as squeezing through very small openings or having to operate two mechanism at the same time.
- The clones themselves have very basic capabilities, only being able to run, jump sneak, and around. They can also bind guards to allow Styx to finish them off, make loud, growling/yelling like noises in order to lure any nearby guards, as well as unfasten chandeliers and loads from cranes, to drop them on unsuspecting enemies that may be beneath and crush them.
- Styx: Shards of Darkness - The clones are now very close to Styx in terms of abilities, having able to do most of them, even executing lethal moves with the right skill. The basic are unchanged, in addition are some that have not been mentioned such as extinguishing torches, carrying dead bodies, throwing them off the rail, creating dense smoke when killed, hiding in crates, and having Amber Vision.
Amber Vision

Amber Vision in Styx: Master of Shadows
Amber Vision temporarily heightens Styx's senses, allowing him to be more aware of his surroundings. Amber Vision can help him gauge where an enemy may be facing if seeing them through a wall, easily detect objects worth collecting, observe sections of walls that are climbable, and see marks left by Ozkan and his smugglers drawn in Amber, which can lead him to hiding places. Since a lot of the areas are quite dark it can be hard to see the environment properly so Amber Vision also allow the player to temporarily brighten the view.
Invisibility
Styx can use Amber to temporarily make himself completely invisible to his enemies. This can allow him to easily escape from an enemy when in combat, or even outright bypass dangerous situations altogether.
Rebirth
- Styx: Shards of Darkness - Styx can spawn a clone of himself and can teleport to its location, killing the clone in the process. This can let Styx quickly escape danger if he's spotted by an enemy, or simply let him rapidly travel from one location to another if need be.
Crafting
- Styx: Shards of Darkness - With the right components and raw materials, Styx can craft many useful items, such as Vials of Life, more Amber, crossbow arrows, lockpicks, acid traps and more.
Amber-independance
- After unlocking all Quartz-fuelled skills (in-game referred to as ultimate skills), Styx becomes somewhat independant from Amber and his Amber gauge slowly refills on its own.
Trivia
- According to the developer blog (styxgame on Tumblr), Styx is 1,28 m (or 4'2") tall.
- While Amber and Quartz may be seen as fictional drug-like substances that Styx often uses, he also mentions being familiar with "plants that take you higher" (Shards of Darkness, Mission 4), hinting that he does consume other drugs as well, although this may be a fourth-wall-breaking joke.
- Styx's blood is dark green as can be seen when he's injured during his escape from prison in the Master of Shadows mission "The Creator".
- The developers mentioned Sméagol from Lord of the Rings as well as Garrett from the Thief games as inspirations for his design and movement in the "Making of a Goblin" feature on youtube (see cyanide's yt channel). He does say Sméagol's signature "my precious" in game once when seeing the large quartz crystal on the roabie queen in mission 4.
Gallery
Of Orcs and Men
Styx: Master of Shadows
Styx: Shard's of Darkness
Videos

STYX MASTER OF SHADOWS - SUMMER TRAILER
| |||||||||||||||||||||||||||||||||||||||||||||||||||||||||||

